Monday

Mini Pies

When I think of Thanksgiving desserts, I immediately think of pies. What to make, then, for a pre-Thanksgiving work party? I didn't really want to whip up five pies at once, not to mention they aren't convenient to eat while mingling. Enter the mini pie. These cuties deliver the comforting taste of pie in a conveniently portable size.


First, roll out your favorite pie dough. I cheated and used a pre-made dough, but any kind will do.Then, cut small circles out of the dough. I used the top of a glass to do the work for me.


Next, place the circles of dough on a prepared baking sheet. Put your filling in the middle of each circle. I used mini Reese's Peanut Butter Cups. 


Pull two sides of the dough up over the filling and pinch together.


Pull the other two sides of dough up and pinch them together.


Press the edges together so that the filling is completely sealed in the dough.


Brush the dough with melted butter and sprinkle sugar on top.


Place in the oven and bake for 20-25 minutes (until they are a nice golden color.) Sprinkle powdered sugar on top and enjoy them warm or cool.


Thank you to Picky Palate for the inspiration!

Recipe
Your favorite pie dough
Filling of choice (I recommend Hershey's Kisses or mini Reese's Peanut Butter Cups)
Sugar
Powdered Sugar

-Preheat oven to 350 F. Line a cookie sheet with parchment paper.
-Roll your pie dough on a lightly floured surface. Cut small circles out of the dough (approximately 3 inches.)
-Place the circles of dough on the prepared cookie sheet. Place your filling in the center of each circle. 
-Gather two sides of the dough over the filling and pinch together. Gather the other two sides of the dough over the filling and pinch together. Press edges tightly closed. 
-Brush prepared mini pies with melted butter and sprinkle sugar on top.
-Place mini pies in the oven and bake for 20-25 minutes (until tops are a nice golden hue.) 
-Remove from oven and allow to cool. Sprinkle powdered sugar on top of mini pies and serve warm or cool. Store in an airtight container. 

Tuesday

PB Pretzel Bites

I don't know how to describe these bites with any word other than YUM. They've got your chocolate, your peanut butter, your salt, your creaminess AND your crunchiness, all rolled into bite-sized delights. I received nothing but compliments and contended sighs from everyone that tried these little gems. Give your taste-buds a treat and make these now.


You don't need too many ingredients, despite all the flavor packed into these little guys. In fact, you probably already have most, if not all, of these in your kitchen. Pretzels, peanut butter, butter, confectioner's sugar, brown sugar and chocolate chips.


Combine the pb and butter.


Add the sugars.


Sandwich the mixture between two pretzels and freeze for a half hour.


Melt the chocolate chips in a double boiler, then dip the pretzel sandwiches in the chocolate. Put them in the fridge until the chocolate is set.


Enjoy!
Thank you to Sweet Pea's Kitchen for the inspiration.


Recipe
1 cup creamy peanut butter
2 Tbsp butter (softened)
1/2 cup confectioner's sugar
3/4 cup light brown sugar
about 1/2 of a 16 oz bag of mini pretzels
1 & 1/2 12oz bags of semi-sweet chocolate chips

-Line a cookie sheet with parchment paper.
-Beat peanut butter and butter with an electric mixer.
-Add confectioner's sugar and light brown sugar to butters and continue to beat until combined.
-Sandwich approximately 1 tsp of the peanut butter mixture between two mini pretzels and place on prepared cookie sheet. Continue this process until the entire peanut butter mixture has been used.
-Freeze for one half hour.
-Melt semi-sweet chocolate chips in the top of a double boiler. Dip about half of each peanut butter/pretzel bite into the chocolate. Place each finished bite back onto the prepared cookie sheet. Once all bites have been dipped in chocolate, place them in the refrigerator until the chocolate is set (approximately 10-20 minutes.) 
-Store in an airtight container, either in the refrigerator or on your counter-top. 

Sunday

Fall Flower Arrangement

My brother and his girlfriend are hosting Thanksgiving this year, leaving me with more time to dream about pies and fall crafts. Since I want the pies to be as fresh as possible, I focused on crafting this week. This festive floral arrangement was extremely easy to make, only took about a half hour to finish and cost just $9!  I'm super happy with how it turned out and it was a lot of fun getting creative with the arrangement. Now I just have to decide if I should give it to my holiday hosts as a thank you gift or keep it all for myself!


To make your own arrangement, you'll need a craft pumpkin, a block of dry floral foam, scissors, wire cutters, a knife and silk flowers.


First, cut the top off of the craft pumpkin. Then, cut the dry floral foam so that it just fits into the pumpkin. 


Next, cut the tags off of the flowers and use the wire cutters to separate the flowers from their bunches.


Finally, embed the flower stems in the floral foam. Arrange the flowers any way you please. I tried to keep a certain color and shape balance so that the final product would look appealing from any angle.


Enjoy!


Monday

Snazzy Fall Wreath

Two things inspired this snazzy wreath - my younger sister's love of faux animal print decorations and a fun Halloween wreath by Landee See, Landee Do. It ended up being inexpensive (under $15 with Michaels coupons) and very easy to make. As an added bonus, it can be customized for various seasons and personal tastes. Step-by-step instructions are included below.
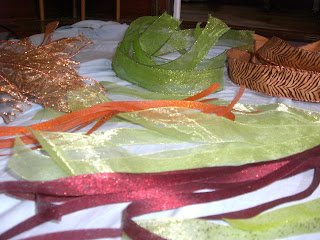
First things first, gather your supplies: a straw wreath base, ribbon of assorted color/design and width, scissors and pins - and that's it!
Next, wrap a layer of ribbon around your straw wreath base. This will ensure that no straw can be seen in your final product. 
Cut strips of ribbon and tie them around the wreath base. I did a simple double knot to make sure they wouldn't shake loose. Keep adding ribbon until the wreath is well covered. I felt that more was better, in this case.
Step back and enjoy!